Ultimate Guide to Brawler’s Guild Bosses in Patch 11.2.7 (Ranks 1–8 Strategies)

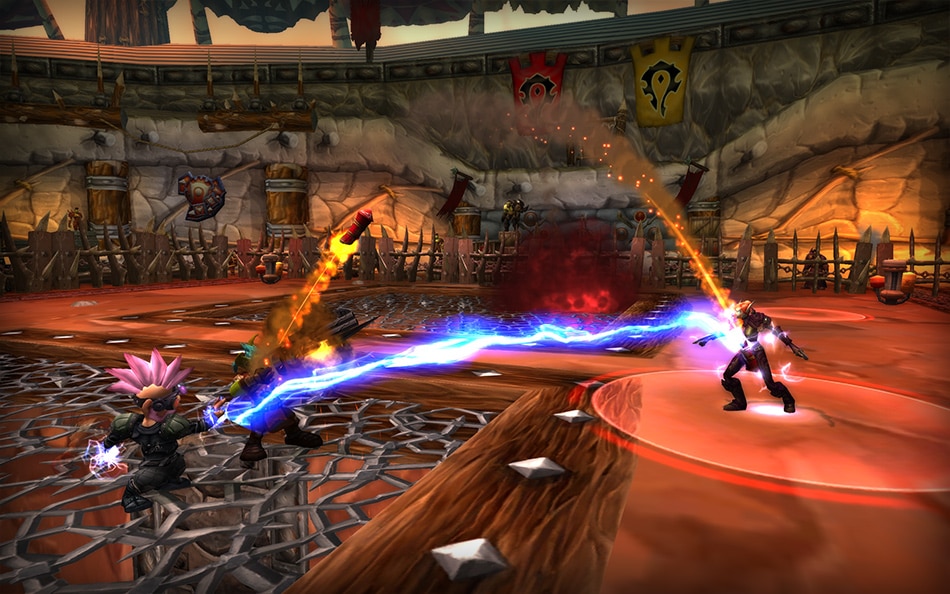
Brawler’s Guild is one of World of Warcraft’s most iconic solo challenge experiences — and The War Within Patch 11.2.7 brings it back with updated bosses, mechanics, and rewards. This guide walks you through everything you need to dominate Brawler’s Guild from Rank 1 to Rank 8: how the system works, general fight tips, boss abilities, and proven strategies to increase your win rate.
Whether you’re grinding for mounts like Brawlin’ Bruno and Ballistic Bronco, cosmetics, or just that personal bragging right, this guide has you covered.
How Brawler’s Guild Works
Before you face the bosses, here’s the setup:
Enter the guild via Bizmo’s Brawlpub or Brawl’gar Arena and queue up for boss fights.
These fights are solo challenges but shared — you compete alongside others in the same instance.
Most fights have a 2‑minute enrage timer — when it expires, fire fills the arena and kills you.
You can track your queue order through the Queued for Brawl buff or the UI queue indicator.
General Tips for All Brawler’s Guild Fights
| Tip | Why It Matters |
|---|---|
| Higher item level helps | Stronger gear increases damage and survivability — mechanics still matter, but gear gives you breathing room. |
| Use healing consumables | Healthstones, potions, and healing items can save runs on tougher bosses. |
| Use interrupts | Many bosses have dangerous casts — interrupts like Kick, Counterspell, etc., can save your life. |
| Play a DPS spec | Fast, burst damage helps finish fights before the enrage timer becomes lethal. |
| Use addons | Tools like Deadly Boss Mods (DBM) track timers and warnings to give you an edge. |
| Keep moving | Constant movement reduces damage taken and helps avoid mechanics like aoe ground effects. |
Brawler’s Guild Bosses Strategy
Below are rank by rank boss tables with key abilities and how to handle them.
Rank 1 Fights
| Boss | Key Abilities | Strategy |
|---|---|---|
| Sunny | Sun Blast (DOT), Germinate spawns Sunlings | Interrupt Sun Blast; dodge Sunling lines and kill adds quickly. |
| Doomflipper | Flipping Out (knockup) | Keep moving; kite until the cast ends then burn. |
| Goredome | Lumbering Charge (one‑shot if hit) | Dodge the charge; then DPS when it's safe. |
| Dippy | Peck, Slippy (knockback) | Stay center, use Slippy to keep him sliding away from walls. |
Rank 2 Fights
| Boss | Key Abilities | Strategy |
|---|---|---|
| Bruce | Chomp Chomp Chomp (frontal) | Interrupt or dodge; circle behind him for safe damage. |
| Bill the Janitor | Summon Broom (adds), Janitor’s Revenge | Interrupt broom summons; control brooms to avoid stacking debuffs. |
| Oso the Betrayer | Shotgun Roar, Clawstrophobic | Avoid frontal cone; dodge knockbacks and leap attacks. |
| The Quacken | Tentickles, Fowl Play | Avoid tentacles; use movement during duck phase. |
Rank 3 Fights
| Boss | Key Abilities | Strategy |
|---|---|---|
| Razorgrin | Bite, Flop | Ranged: attack freely; Melee: flank or kite. |
| Blat | Split creates clones | Focus the original; kite and ignore clones. |
| Ooliss | Horrific Pursuit (instant death chase) | Keep distance; snare and kite constantly. |
| King Kulaka | Dash | Use offense early; kite with cooldowns and defensives. |
Rank 4 Fights
| Boss | Key Abilities | Strategy |
|---|---|---|
| Meatball | Strange Energy, MEATBALL MAD! | Stack purple orbs, then burn before enrage. Use defensives as needed. |
| Ash’katzuum | I Pick You! (battle pets) | Burst boss while dodging pets; cooldown usage helps. |
| Crush | Collision stuns self on wall hit | Sidestep the stun then DPS. |
| Glorp | Gloop pools and Gloopsie | Avoid pools; reposition after resets and heal proactively. |
Rank 5 Fights
| Boss | Key Abilities | Strategy |
|---|---|---|
| Klunk | Klunk pull mechanics | Stay ranged; kite while burning him down. |
| Stitches | Aura of Rot, Hook | Clear stacks by stepping out periodically; anticipate hooks. |
| Topps | Collision, Dino Dash | Dodge dashes, use burst during vulnerability windows. |
| Carl | Burrow, lava fire walls | Reposition constantly; burn fast before fire covers the arena. |
Rank 6 Fights
| Boss | Key Abilities | Strategy |
|---|---|---|
| Leper Gnome Quintet | Leperous Spew, Determined Shuffle | Kite, cleave, and control the group with slows/roots. |
| Mecha‑Bruce | Power upgrades, Stasis Beam, chomps | Corner tank and burn; avoid stuns and distance yourself on upgrades. |
| GG Engineering | Shield, teleport, rockets | Focus shield generators; avoid rockets; split DPS on both bosses. |
| Dippy & Doopy | Peck, Slippy (knockback) | Kill Dippy first; kite Doopy; use Slippy triggers continuously. |
Rank 7 Fights (Final)
| Boss | Key Abilities | Strategy |
|---|---|---|
| Renegade Swabbie | The Storm, Searing Axe | Stay ahead of storm; interrupt heals by destroying the tower. |
| Ogrewatch Crew | High Noon, Barrier Projector, bombs | CC barriers, burn Dole quickly, then Hudson, and dodge Stuffshrew’s bombs. |
| Blingtron 3000 | Rockets, Overcharged! | Kill adds, activate coil, then burst while avoiding rockets. |
| Epicus Maximus | Destructolaser, Blue Crush, exploding zones | Move nonstop, interrupt Blue Crush, kite lasers, maintain DPS. |
Rank 8 Rewards
Reaching Rank 8 unlocks:
Ballistic Bronco mount – a must for collectors
Brawler’s Razor Claws (heirloom)
Brawler’s Garb ensemble
Champion Brawler’s Gloves – stylish housing decoration
All previous mount rewards like Brawlin’ Bruno
If you’re stuck, consider using our boost service with promo code BLOG10 — designed to help you reach Rank 8 faster and safer.
Conclusion
Brawler’s Guild is about mastering mechanics, timing, and movement, not just burst damage. With each rank the fights demand sharper focus and tighter execution. Use the strategies above as a foundation — practice, adapt, and you’ll clear the most iconic solo combats WoW has to offer.
Pro Tip: Always review your spec and gear before attempting higher ranks — better accuracy and survival are game changers here.
FAQ (Optional)
Q: What spec works best?
A: High DPS specs dominate due to the strict enrage timers.
Q: Does rank reset?
A: No — your progress stays account‑wide until you clear the next rank.
