Tier 6 Sets in TBC Classic — Token Sources, Set Bonuses, and How to Plan Your Pieces
Tier 6 is the third and final raid tier of The Burning Crusade, spread across three raids: Hyjal Summit, Black Temple, and Sunwell Plateau.
Most guides list these sets class by class. That's fine as a reference, but it doesn't answer the question players actually have when they're planning a raid week: which boss do I need for the piece I'm missing, and how far into the tier do I have to get before my set bonus turns on?
This guide is organised around that. Full token map first, class bonuses after.
How Tier 6 Works
Five pieces per set, with bonuses at 2 pieces and 4 pieces worn. You don't need the full set to get everything — the 5th piece is stat value only.
Tier pieces don't drop directly. Bosses drop tokens shared between three classes, which you redeem at a vendor for your class-specific piece.
Hybrid classes get multiple versions. Druid, Paladin, Priest, Shaman, and Warrior each have separate sets per role, redeemed from the same token.
Token Types
Token | Classes |
|---|
Forgotten Conqueror | Paladin, Priest, Warlock |
Forgotten Vanquisher | Druid, Mage, Rogue |
Forgotten Protector | Hunter, Shaman, Warrior |
Redeem tokens with Tydormu, found outside the entrance to Hyjal Summit.
The Token Map — Which Boss Drops What

This is the table worth bookmarking.
Slot | Boss | Raid | Boss Position |
|---|
Gloves | Azgalor | Hyjal Summit | 4th |
Helm | Archimonde | Hyjal Summit | 5th (final) |
Shoulders | Mother Shahraz | Black Temple | 7th |
Legs | The Illidari Council | Black Temple | 8th |
Chest | Illidan Stormrage | Black Temple | 9th (final) |
Bracers | Kalecgos & Sathrovarr | Sunwell Plateau | 1st |
Belt | Brutallus | Sunwell Plateau | 2nd |
Boots | Felmyst | Sunwell Plateau | 3rd |
The Progression Insight: Where Your Set Bonuses Come From
Look at that table again and a clean structure emerges.
Your five core set pieces come entirely from Hyjal Summit and Black Temple:
Hyjal Summit gives you 2 pieces — Gloves and Helm
Black Temple gives you 3 pieces — Shoulders, Legs, and Chest
That produces three practical planning rules:
1. Your 2-piece bonus is available without ever entering Black Temple. Azgalor and Archimonde are the fourth and fifth bosses of Hyjal. Clear Hyjal, collect both tokens, and your 2-piece is live. For guilds working into the tier, this is the first meaningful power spike and it's fully accessible.
2. Your 4-piece requires Black Temple progression. You need at least two of the three BT tokens, and the earliest of those is Mother Shahraz — the seventh boss. There's no shortcut. If your guild is stalled before Shahraz, your 4-piece is gated until that changes.
3. The Chest token is the deepest requirement in the set. Illidan is the final boss of Black Temple. Most players complete their 5-piece well after they've been running 4-piece for weeks.
If you're choosing which tokens to bid on or roll for, prioritise reaching your 4-piece over completing the 5-piece. The 4th piece is a bonus; the 5th is just stats.
Sunwell Plateau adds bracer, belt, and boot tokens on top of the five-piece set — three additional slots using the same token system.
All three have a backup source. Grand Warlock Alythess and Lady Sacrolash, the fourth boss encounter in Sunwell, can drop bracer, belt, and boot tokens as well as their own loot.
But don't rely on them. Alythess and Sacrolash have an unusually large loot table, which dilutes the chance of any specific token appearing. Kalecgos, Brutallus, and Felmyst have significantly smaller tables, which makes them the more reliable sources for their respective slots.
Practical approach: treat Kalecgos, Brutallus, and Felmyst as your primary targets for bracers, belt, and boots. Treat the Alythess and Sacrolash drops as a bonus roll on anything you've been unlucky with, not as a plan.
All Tier 6 Set Bonuses by Class
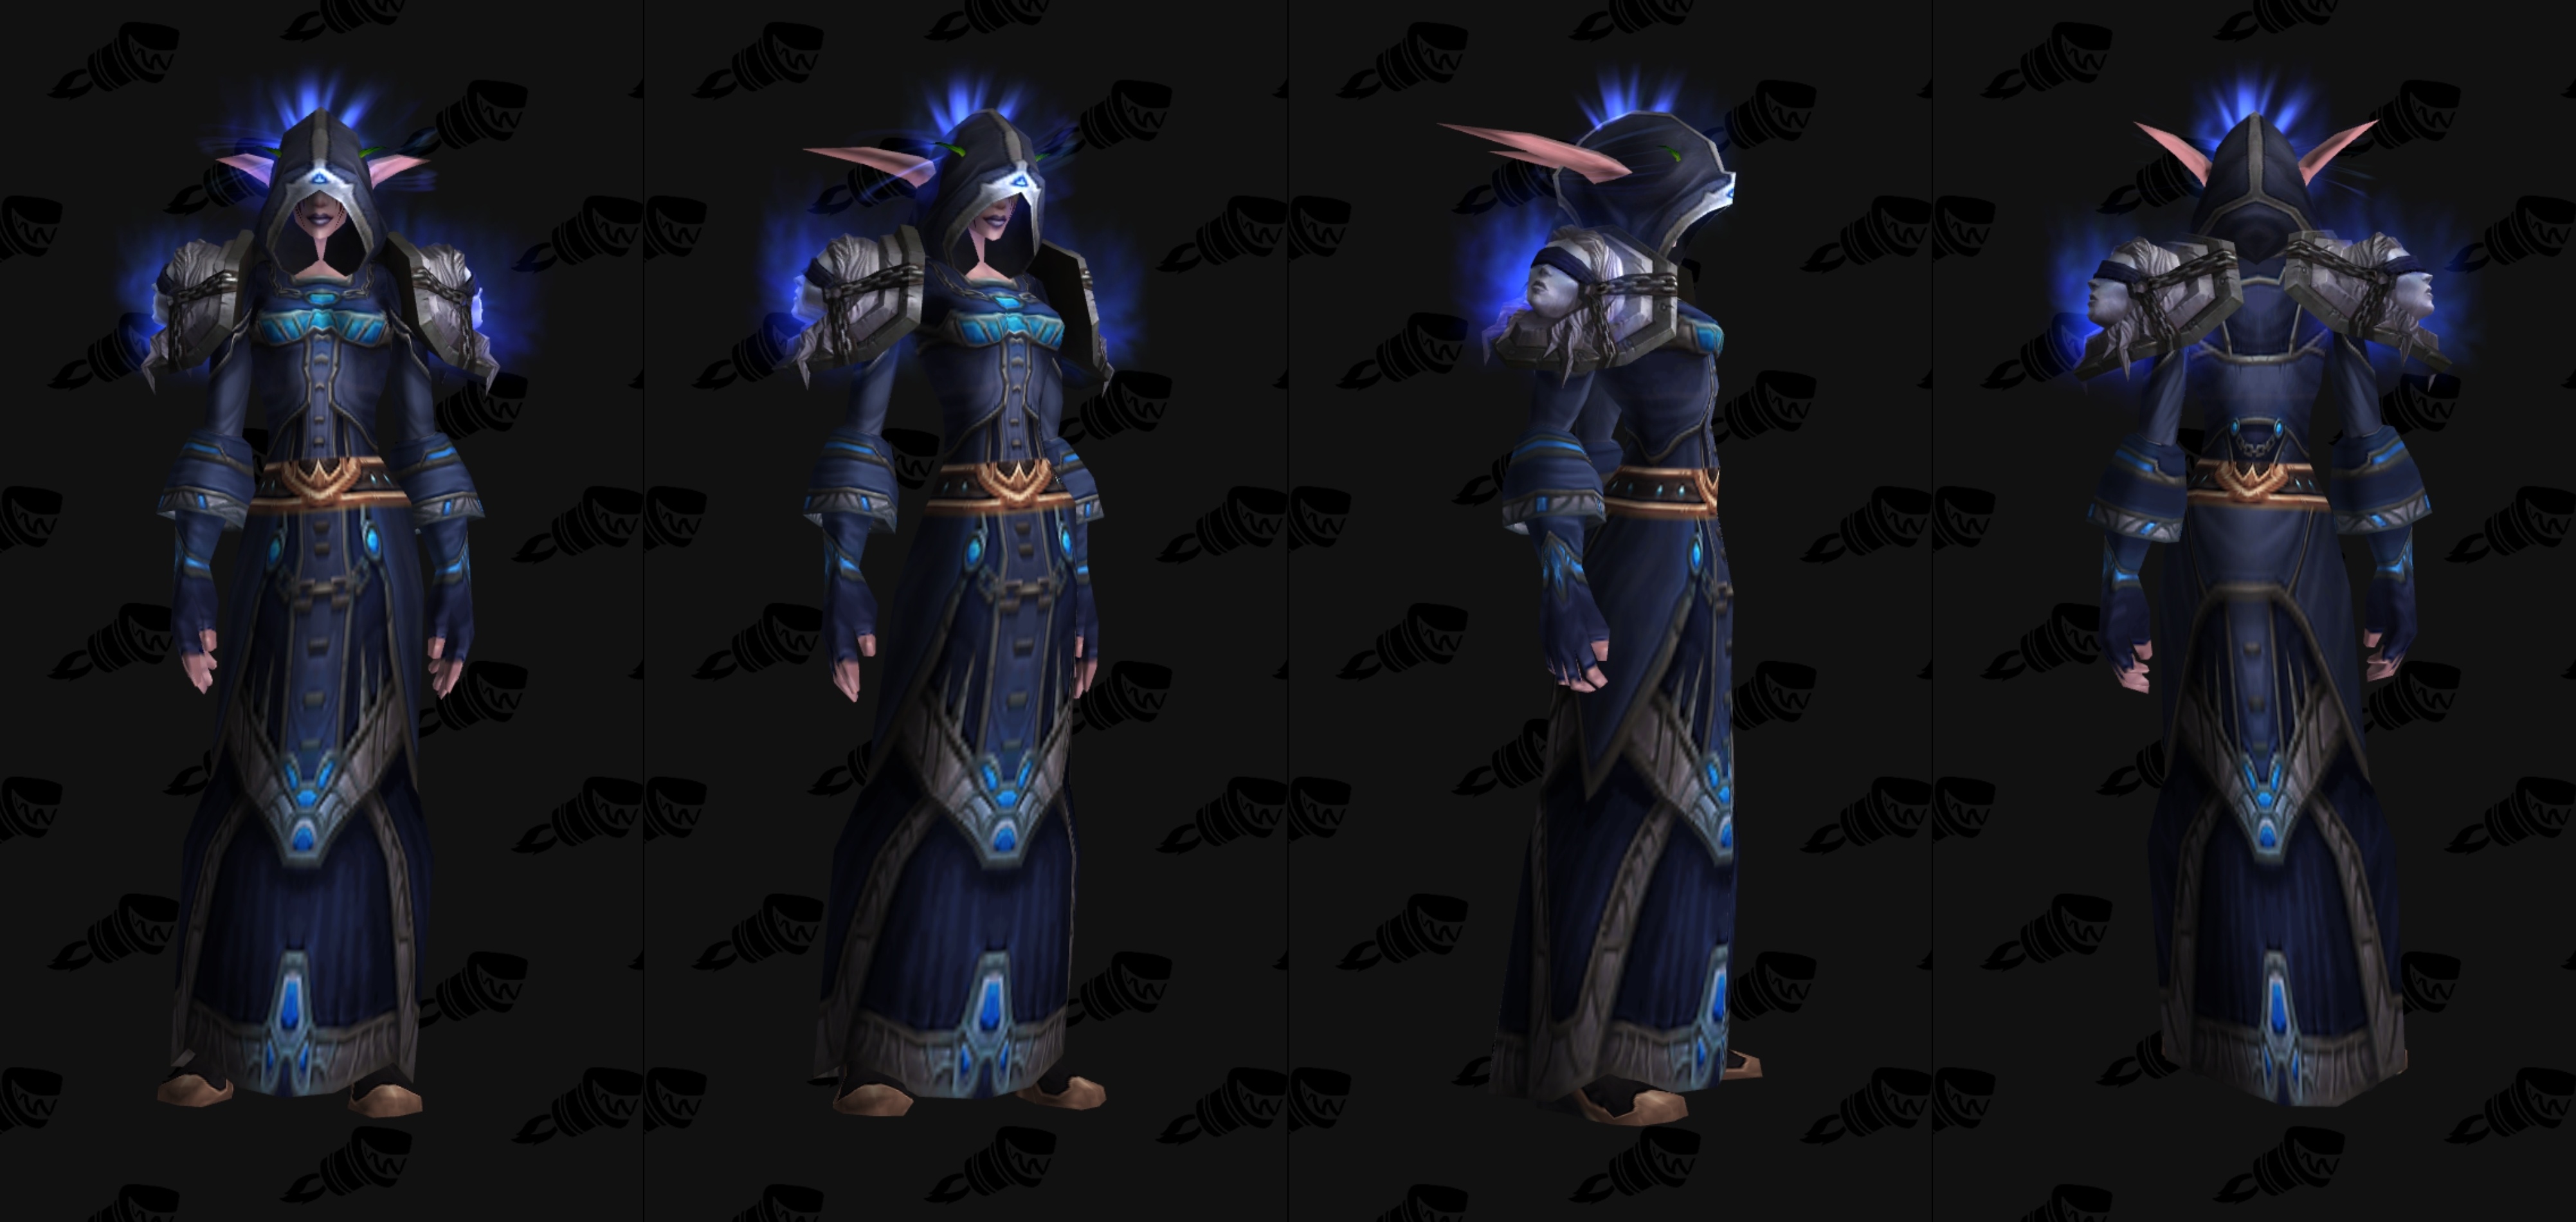
Druid — Thunderheart
Balance: Thunderheart Regalia
Feral: Thunderheart Harness
2 pieces: Mangle (Cat) energy cost reduced by 5; Mangle (Bear) threat increased by 15%
4 pieces: Rip, Swipe, and Ferocious Bite damage increased by 15%
Restoration: Thunderheart Raiment
The Feral 4-piece is one of the strongest damage bonuses in the tier — a flat 15% across three core abilities, and it serves both Cat and Bear.
Hunter — Gronnstalker's Armor
Steady Shot is the backbone of the Hunter rotation, which makes this 4-piece a straightforward throughput gain with no play-around required.
Mage — Tempest Regalia
2 pieces: Evocation duration increased by 2 seconds
4 pieces: Fireball, Frostbolt, and Arcane Missiles damage increased by 5%
Covers all three specs equally — rare for a tier bonus, and it means no spec is penalised for the set.
Paladin — Lightbringer
Holy: Lightbringer Raiment
Protection: Lightbringer Armor
Retribution: Lightbringer Battlegear
Protection's bonuses are both sustain and threat — the Consecration increase matters more for hold-everything tanking than the raw number suggests.
Priest — Absolution
Holy/Discipline: Vestments of Absolution
Shadow: Absolution Regalia
The Shadow 2-piece is quietly excellent — a longer SW:P means fewer refresh globals, which frees up rotation time on top of the direct value.
Rogue — Slayer's Armor
2 pieces: Slice and Dice haste increased by 5%
4 pieces: Backstab, Sinister Strike, Mutilate, and Hemorrhage damage increased by 6%
Both bonuses are unconditional and apply to every Rogue spec. One of the cleanest sets in the tier.
Shaman — Skyshatter
Elemental: Skyshatter Regalia
2 pieces: With an air, earth, fire, and water totem active simultaneously — 15 mana per 5 sec, 35 spell crit rating, and up to 45 spell damage
4 pieces: Lightning Bolt damage increased by 5%
Enhancement: Skyshatter Harness
2 pieces: Earth Shock, Flame Shock, and Frost Shock cost 10% less mana
4 pieces: Stormstrike grants 70 attack power for 12 seconds
Restoration: Skyshatter Raiment
The Elemental 2-piece is conditional — you need all four totem types down at once. Worth building your totem routine around, because the combined stat package is substantial.
Warlock — Malefic Raiment
The 2-piece is meaningful self-sustain across a long fight, and the 4-piece covers both Destruction and Shadow builds.
Warrior — Onslaught
Arms/Fury: Onslaught Battlegear
Protection: Onslaught Armor
The Arms/Fury 2-piece scales with fight length — the more execute phase a boss has, the more it's worth.
Planning Your Tier
If your guild is starting Hyjal: target Azgalor and Archimonde for your 2-piece. Both are late-raid bosses, so they come with full clears rather than early progression, but they're the entire requirement for your first bonus.
If your guild is progressing Black Temple: Mother Shahraz at boss seven is your gateway to the 4-piece. Combined with your two Hyjal tokens, one Shahraz token completes it.
If you're in Sunwell: bracers, belt, and boots come from the first three bosses. Prioritise Kalecgos, Brutallus, and Felmyst over hoping for backup drops from Alythess and Sacrolash.
Loot council and DKP considerations: the jump from 2-piece to 4-piece is a real power increase for every spec in the game. Weighting tier tokens above comparable off-set pieces is usually correct until everyone's 4-piece is secured.
Quick Reference
Raids required for your 5-piece: Hyjal Summit (2 pieces) and Black Temple (3 pieces).
Vendor: Tydormu, outside Hyjal Summit.
Token by class: Conqueror for Paladin, Priest, Warlock. Vanquisher for Druid, Mage, Rogue. Protector for Hunter, Shaman, Warrior.
Deepest requirement: the Chest token from Illidan Stormrage, the final boss of Black Temple.