Valeera has three equipment slots in Season 2, and most loadout guides collapse them into a single "best build" recommendation. That misses what's actually interesting about the system.
You equip one Combat Curio, one Utility Curio, and one Poison — and none of them gate each other. Three independent choices, which means the right answer depends on your class, your gear, and what you're running.
There's also a specific pairing that automates the strongest Utility Curio for classes with weak interrupts, which is worth more than any single "best" pick.
The Slot Structure
Slot | Options | How You Get Them |
|---|---|---|
Combat Curio | 3 | Delve completion chests |
Utility Curio | 3 | Delve completion chests |
Poison | 6 | 3 default, 3 from the seasonal intro |
Valeera's role — Tank, Healer, or DPS — does not restrict any of these. In Season 1, Poisons were tied to her role. That's gone. You pick her role and your three items completely independently.
Curios have four ranks. You can't upgrade them directly — you find higher-rank versions in higher-tier Delves and they replace what you have. Running Tier 11 isn't just about crests and Journey points; it's also how you get rank 4 Curios.
Season 2 Curios must be collected fresh. Nothing carries over from Season 1.
The Three Combat Curios
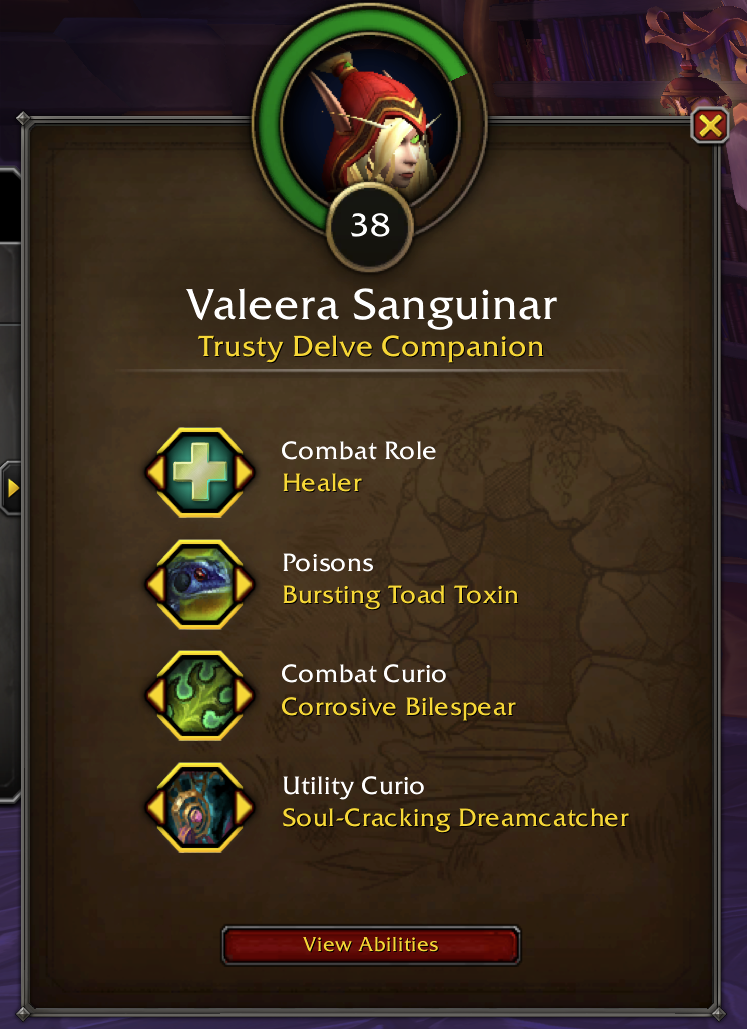
Corrosive Bilespear — Valeera periodically impales nearby enemies for heavy Nature damage during combat.
Straightforward passive damage with no conditions attached. It works in large pulls and single-target fights equally, which is exactly what you want from a slot you set once and forget.
Essence Trap — Valeera places traps during combat. Enemies approaching a trap are slowed, then the trap detonates for Nature damage and stuns everything inside.
Damage plus crowd control, but positional — the value depends on enemies walking into the traps. Better in corridor Delves where mobs path predictably than in open arenas where they scatter.
Ouroboric Curse — When your health falls below 50%, nearby enemies are Horrified while you gain increased Primary Stat, Leech, Avoidance, and Speed. Killing Poisoned enemies reduces the remaining cooldown.
A panic button that also functions as a burst window. The cooldown reduction clause is the part worth noticing — it scales with how many Poisoned enemies you're killing, which ties directly into your Poison choice.
The Three Utility Curios
Soul-Cracking Dreamcatcher — Interrupting or crowd-controlling an Elite enemy makes it take increased damage.
The strongest Utility Curio for Tier 8+ content, because Elite enemies are where high-tier Delves actually threaten you. Shortening those fights is worth more than passive value elsewhere.
The caveat nobody mentions: this requires you to interrupt or CC. It is not passive. If your class has limited interrupt access, or if you're running a rotation where kicks aren't reliable, this Curio does considerably less than its reputation suggests. See the synergy section below for the fix.
Dundun's Favor — Mislaid Spirits can appear near you in combat. Walking over a Mislaid Spirit or Mislaid Curiosity launches Volatile Sprites at nearby enemies for additional damage.
Modest combat value, but it changes how you move. Curiosities activate on contact rather than requiring a cast, and can be collected in combat. If you're levelling Valeera or farming Delver's Journey points, this is the Curio that turns a stop-start route into a continuous one.
Venom Infusion — Party members become Poisoned on entering combat, periodically losing a small amount of health while gaining Movement Speed and Haste based on current health.
A self-damage tradeoff. The Haste is real, but so is the health drain, and in Tier 11 content your health bar is already the thing keeping you honest. Situational at best for most players.
The Six Poisons
Available by default:
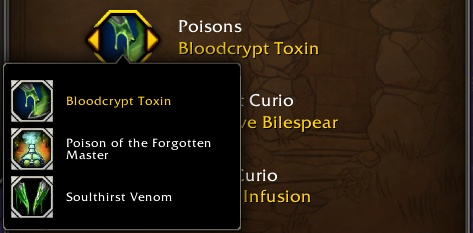
Bloodcrypt Toxin — Enemies struck by poisoned weapons deal 10% less damage and have 10% reduced Haste for 20 seconds.
The best general-purpose option. Its value is consistent — it doesn't depend on avoiding damage, waiting for a proc, or a specific pull size. In content where survival is the constraint, a flat 10% enemy damage reduction is the most reliable thing on the list.
Poison of the Forgotten Master — Increases your damage while you remain in combat without taking damage, gaining stacks over time. The effect is lost when you're hit.
This is a gear check disguised as a Poison. Well-geared players clearing content comfortably will hold stacks and get real value. Anyone pushing above their item level will lose the stacks constantly and get nothing. Take it when you're overgearing, not when you're struggling.
Soulthirst Venom — Increases Leech, Avoidance, and Speed.
A balanced sustain and mobility package. Nothing spectacular, nothing situational — a reasonable default if you dislike the conditions on the other two.
Unlocked through the Season 2 Delve introduction (Seasonal Refresher: Midnight):
Bursting Toad Toxin— Enemies struck by poisoned weapons can burst with poison, dealing Nature damage to nearby enemies.
Your AoE option. Spreads Poison across packs, which matters more than the raw damage — see the synergy section.
Frostheart Venom — Slows affected enemies and reduces their attack and casting speeds.
Control and survivability. Overlaps with Bloodcrypt Toxin's role but trades the damage reduction for slows. Useful in Delves where kiting is part of the plan.
Phantasmal Spore Toxin — Poisoned attacks can interrupt and briefly Fear enemies.
Automated crowd control, and the key to the best synergy in the system.
The Two Synergies That Actually Matter
Phantasmal Spore Toxin + Soul-Cracking Dreamcatcher
Dreamcatcher amplifies damage on Elites you interrupt or crowd-control. Phantasmal Spore Toxin interrupts and Fears automatically through poisoned attacks.
Put them together and Dreamcatcher triggers itself.
This matters most for two groups of players:
Classes with limited interrupt access. If you're playing a spec where kicks are on a long cooldown or awkward to weave in, Dreamcatcher normally underperforms. Phantasmal Spore Toxin fixes that without changing how you play.
Anyone running high-tier Delves solo. You're already managing positioning, cooldowns, and Valeera's behaviour. Removing one thing you have to actively watch for is worth real time across a farming session.
The tradeoff is giving up Bloodcrypt Toxin's flat damage reduction. If survival isn't your bottleneck, this pairing is stronger.
Ouroboric Curse + Bursting Toad Toxin
Ouroboric Curse's cooldown drops faster when you kill Poisoned enemies. Bursting Toad Toxin spreads Poison across packs through its burst effect.
More Poisoned enemies means more Poisoned kills means Ouroboric Curse comes back sooner.
In dense AoE content — Delves with heavy trash, or farming runs where you're pulling large — this turns a long-cooldown emergency button into something closer to a rotational tool.
It's a build for a specific purpose rather than a general recommendation. If you're grinding Delver's Journey points through packed Delves, it's worth testing.