Aion 2 Global gives every class a large toolkit: 12 active skills, 10 passives and a pool of 13 Stigmas. Yet the builds that clear content fastest look surprisingly similar from player to player. The reason is simple. A handful of skills in each kit unlock rotation-changing Specialties at specific levels, and the whole build is about reaching those breakpoints as early as possible instead of spreading points evenly.
In this guide, the Mythic Store team breaks down the strongest PvE setup for all eight Global classes. For each class we cover what the build is trying to do, which skills to push first, which Stigmas and passives matter, how to set up your macro and what to prioritize on gear. These setups carry you through leveling, Expeditions, Transcendence and general endgame progression.
How Builds Work in Aion 2
Before picking a class build, it helps to understand the four systems every build is made of. Once these click, every class guide below makes much more sense.
Active Skills and Specialty Breakpoints
Skill points from leveling can only raise an active skill to level 10. Everything above that comes from outside sources, mainly Daevanion boards, Arcana and skill-level lines on gear.
The real power is in Specialties, the selectable modifiers that change how a skill behaves:
Level 8: the first three Specialty options and your first equipped slot
Level 12: the fourth option and a second slot
Level 16: the fifth option, which is often the build-defining one (cooldown removal, guaranteed crits, chain skills)
Level 20: a third equipped slot
This is why every build below talks about "getting skill X to 16." For most classes, one or two level 16 Specialties are what turn a slow rotation into a fast one. Two core skills at level 16 almost always beat one skill at 20 and everything else lagging behind.
Passive Skills
Passives have no Specialties. They are flat bonuses, usually damage, critical or party-wide effects. They matter, but most classes should push their key active skills first and fill passives along the way.
Stigmas
Stigmas are a separate, class-specific skill pool. You can equip four of the thirteen, and the four slots open at character levels 22, 27, 32 and 37. Stigmas level with Stigma Shards, not skill points, and they have their own Specialty-style perks that unlock as they level.
Shards are limited, so the general rule is to commit to one Stigma at a time and push it to its key breakpoint rather than raising all four evenly.
Macros
Aion 2's in-game macro lets you chain several skills onto one key. Every serious PvE build uses it. The common pattern is:
A short chain of core damage skills in the macro
A spammable filler on left mouse button, held alongside the macro key
Big buffs, defensive cooldowns and burst Stigmas kept manual so you can time them
Stats: Accuracy First
Across every class, Accuracy comes first, up to whatever the content you are running requires. Missing attacks wastes everything else. After that, each class has its own priority, covered below. Early on you mostly chase item level, and specific stat rerolls become worth it once your gear is close to endgame.
Gladiator Build

Role: greatsword melee bruiser and off-tank
The Gladiator's PvE build revolves around making Overhead Slam usable as often as possible. Normally the skill only becomes available against knocked-down targets or on a small proc chance. The Rage Burst Stigma opens a ten-second window where you can use it freely, and its level 16 Specialty removes the cooldown entirely. That combination is the heart of the class.
Skill Priority
Overhead Slam to 16 first. The cooldown removal Specialty is what turns Rage Burst into a burst window.
Rending Blow to 16 next. Its multi-target damage and MP restore on crit let you mostly stop using Keen Strike for mana.
Ruinous Blow and Sword Aura Rampage after. Ruinous Blow grants Prepare for Battle, a strong PvE damage buff, and both skills improve the rotation without changing its shape.
Leaping Slam, Rush Strike and Defiance only need early breakpoints for mobility and crowd-control escape.
Stigmas
Rage Burst: the core of the build, unlocks Overhead Slam on its target for ten seconds
Lunge Stance: Combat Speed buff, and its higher-level perk lets crits shave time off cooldowns, which speeds up the whole loop
Focused Block: strong defensive tool for heavy hits
Zikel's Blessing: extra Attack and Accuracy for burst windows
Take Rage Burst and Focused Block to their early breakpoints first, then make Lunge Stance your main long-term Shard investment.
Passives
Experienced Counterstrike: turns successful blocks into a party-wide damage buff
Attack Preparation: straightforward PvE damage and Accuracy
Impact Hit and Murderous Burst: scale better once your gear adds crit and Double
Macro and Stats
Macro: Rage Burst → Overhead Slam → Rending Blow
Manual: Lunge Stance, Zikel's Blessing, Ruinous Blow, Focused Block
Stat priority: Accuracy → Critical Hit → Double → Attack / Damage Boost
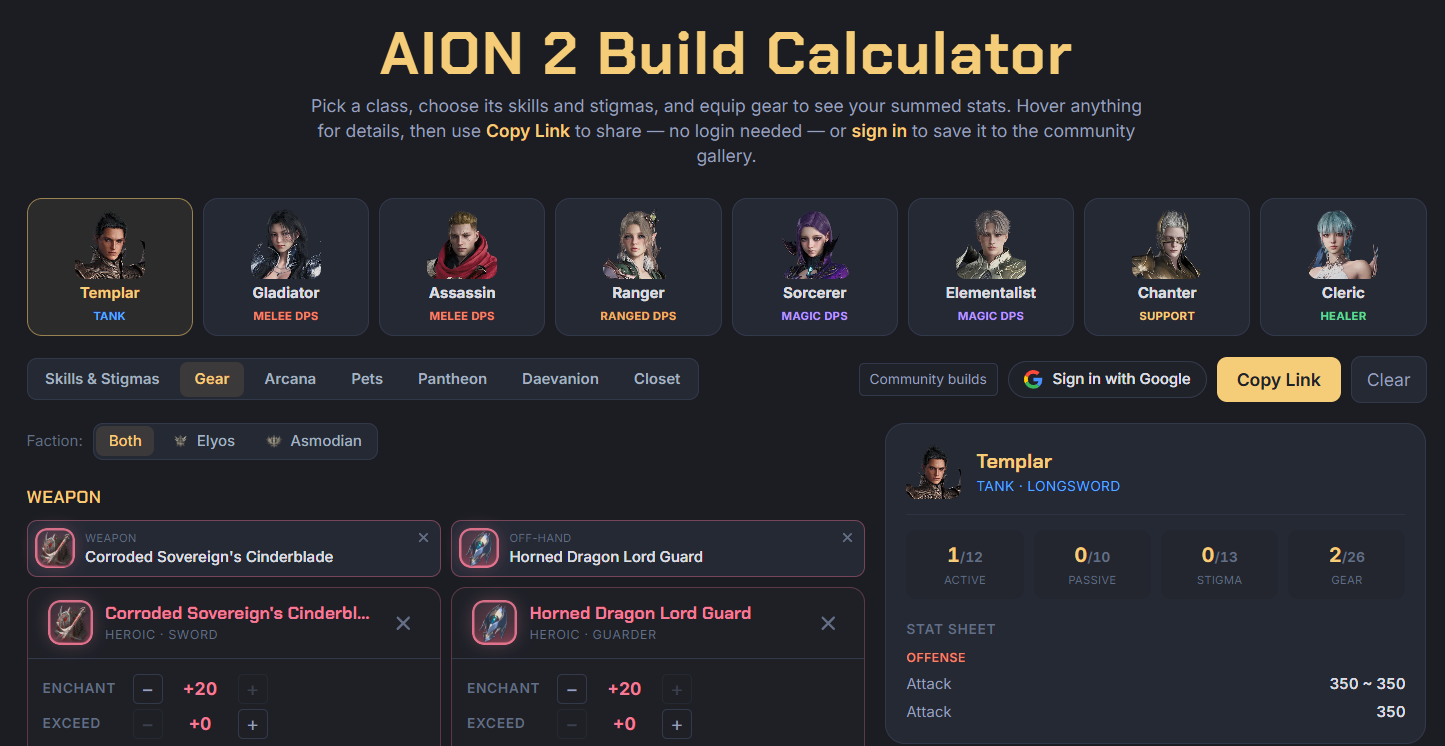
Templar Build

Role: dedicated tank
A good Templar does more than hold aggro. The PvE build is about triggering Judgment through shield skills as often as possible while keeping Punishment ready for damage windows. You hold Enmity naturally through the rotation and still contribute real damage.
Skill Priority
Judgment to 16 first. Its cooldown-removal Specialty lets you cash in every trigger instead of waiting on the timer.
Vicious Strike, Warding Strike and Shield Smite to 12. Several of these trigger Judgment, and Vicious Strike's Specialty shortens Warding Strike's cooldown, which feeds even more Judgment procs.
Punishment to 16. It grants the Executor buff, which boosts Accuracy and PvE damage.
Annihilate follows as a payoff on stunned or knocked-down targets.
Stigmas
Doom Shield: gap-closer with a shield and a Judgment trigger
Battlefield Banner: Attack scaling from Defense, gets much better with investment
Taunt: emergency aggro control
Empyrean Lord's Punishment: heavy stagger damage and a stun
If the group needs more protection, Nezekan's Shield is the common defensive swap.
Passives
Fury: turns your blocks into a party damage buff, your most important passive
Ironclad Defense, Insulting Roar and Impact Hit after that
Note that Fury and the Gladiator's Experienced Counterstrike buff do not stack, so a group with both only benefits from one.
Macro and Stats
Macro: shield skills that trigger Judgment, with Judgment woven in
Left mouse button: Vicious Strike
Manual: Punishment, Taunt, defensive cooldowns
Stat priority: Accuracy → Combat Speed → Attack / Damage Boost → Block
Assassin Build

Role: burst melee DPS
The Assassin is one of the highest-damage classes in Aion 2, but it asks the most from your positioning. The build combines three ideas: landing critical hits, stacking Insignias on the target and attacking from behind.
Heart Gore only becomes available after a critical hit, and its level 16 Specialty resets its cooldown on crit. Once that is online, the class turns into a chain of Heart Gore activations during burst.
Skill Priority
Heart Gore to 16 first. This is the biggest power spike in the kit.
Insignia Explosion and Quick Slice to 16 next. One detonates Insignia stacks, the other feeds crits and shortens Insignia Explosion's cooldown.
Savage Roar only needs its early Skill Speed Specialty, since its job is applying Insignias quickly.
Shadowstrike, Ambush and Infiltrate support positioning behind the boss.
Stigmas
Triniel's Dagger: heavy single-target hit, and its perk reduces all cooldowns on hit, so push it early
Illusive Clone: removes Heart Gore's cooldown during its duration and adds extra damage
Swift Contract: Combat Speed buff, paired with Illusive Clone for your main burst window
Savage Fang: instantly applies a full Insignia stack
Passives
Exploit Weakness: adds Critical Hit and can summon clones that apply Insignias for you
Rear Smite: extra damage from behind, which is where you should be anyway
Assault Stance and Impact Hit after that
Macro and Stats
Macro: Insignia Explosion → Heart Gore → Savage Roar
Left mouse button: Quick Slice
Manual: Illusive Clone, Swift Contract, Triniel's Dagger, Shadowstrike, Ambush
Stat priority: Accuracy → Critical Hit → Back Attack Damage → Critical Damage / Weapon Damage
Ranger Build

Role: ranged physical DPS
The Ranger is one of the most comfortable classes to learn. The build keeps two buffs running, Precision from Marking Shot and Gale from Gale Arrow, and fires Deadshot inside those windows. Deadshot deals noticeably more damage while Precision is active, so firing it without the buff is wasted damage.
Skill Priority
Deadshot and Gale Arrow first. They carry the main damage and the buff uptime.
Drill Dart and Snipe next. Snipe restores MP and shortens Deadshot's cooldown.
Tempest Shot only needs level 16 in this build.
Snare Shot, Marking Shot and Burst Arrow at their early breakpoints. Snare Shot matters because Burst Arrow hits harder against slowed or rooted targets.
Keep in mind that each extra skill level adds only a little base damage. The value is in the Specialties, so stop investing in a skill once you have the breakpoint you need.
Stigmas
Vaizel's Authority: your main investment, its higher-level perk lets crits reduce all cooldowns
Bow of Blessing: offensive buff that gains Multi-Hit and crit damage as it levels
Supporting Fire: extra attack source for a short duration
Griffon Arrow: damage plus a burning damage-over-time effect
Level these evenly for their early breakpoints, then push Vaizel's Authority first.
Passives
Macro and Stats
Macro line 1: Griffon Arrow → Snare Shot → Burst Arrow
Macro line 2: Gale Arrow → Drill Dart → Tempest Shot
Manual: Deadshot, Marking Shot (refresh before Precision ends), main buffs
Stat priority: Accuracy → Critical Hit → Attack → Double / Damage Boost
Marking Shot already gives a large Critical Hit bonus, so hitting your crit target is usually easier than hitting your Accuracy target.
Sorcerer Build

Role: ranged magic burst DPS
Sorcerer damage comes from cycling Hellfire, a chargeable fire nuke, as often as possible. Firestorm is the key enabler, because each of its projectiles shaves time off Hellfire's cooldown. Wish of Concentration then cuts all active cooldowns further.
Mana is the second half of the build. Grace of Enhancement gives a large damage bonus only while your MP stays above a threshold, so running dry costs you more than just the next cast.
Skill Priority
Wish of Concentration, Blaze and Flame Arrow to 16 first. They drive the cooldown cycle and MP sustain.
Hellfire, Firestorm, Winter's Shackles and Bittercold Wind to 16 next.
Early on, take Specialties that restore MP or reduce MP costs. Swap them for damage once your gear sustains your mana comfortably.
Stigmas
Element Enhancement: your main investment, boosts Fire and Water damage and improves passives
Delayed Explosion: delayed damage plus an MP restore, good before burst
Fire Wall: ground area that burns enemies inside it
Cold Storm: water area, strong on bosses that stay in place
Passives
Robe of Flame and Grace of Enhancement first
Vitality Evaporation and Fire Mark next
Robe of Earth for extra MP and sustain
Macro and Stats
Macro: Element Enhancement → Winter's Shackles → Blaze
Left mouse button: Flame Arrow
Manual: Hellfire, Wish of Concentration, defensive and burst tools
Stat priority: Accuracy → Cooldown Reduction → Combat Speed → Attack → Critical Hit / Double
Spiritmaster (Elementalist) Build

Role: ranged summoner DPS
The Global client calls this class Spiritmaster, while many databases still use its internal name, Elementalist. Either way, it is the orb-wielding caster that fights through elemental spirits.
Instead of one fixed rotation, the Spiritmaster builds toward Elemental Fusion. Spirit attacks and summons generate elemental stacks, and once four are built, Fusion delivers one of the biggest hits in the kit. The goal is to fill that meter as fast as possible.
Skill Priority
Cold Shock, Combustion, Jointstrike: Curse, Dimensional Control and Elemental Fusion are your main damage skills, so they get the investment.
Spirit summons are situational: Water for single target (and MP), Fire for groups, Earth to tank enemies for you.
Wind Spirit is useful early as an extra Fusion stack, but becomes optional once your spirits generate stacks quickly on their own.
Stigmas
Summon: Ancient Spirit: the centerpiece, its attacks feed Elemental Fusion and get faster with investment
Flame Blessing: offensive buff for your damage window
Jointstrike: Destructive Attack: an extra heavy spirit attack
Jointstrike: Corrode: debuff that boosts ongoing spirit damage
Get all four to their early breakpoints, then push Ancient Spirit first. Once Ancient Spirit is strong enough, it can replace Wind Spirit in your summon line.
Passives
Spirit Strike and Spirit Descent first, since the build lives on spirit damage
Consecutive Countercurrent next
Crit-based passives later, once your gear provides enough Critical Hit to activate them reliably
Macro and Stats
Macro line 1: Water Spirit → Corrode → Earth Spirit → Fire Spirit
Macro line 2: Jointstrike: Curse → Elemental Fusion → Dimensional Control → Combustion
Manual: Summon: Ancient Spirit and main buffs, used together to open your burst
Stat priority: Accuracy → Combat Speed → Attack → Critical Hit → Double / Damage Boost
Cleric Build

Role: healer with real damage contribution
The Aion 2 Cleric is not a stand-in-the-back heal bot. It is a ranged caster that spends most of a fight debuffing and damaging the boss, then heals when the party actually needs it.
The damage core is Chain of Torment into Condemnation. Chain of Torment applies the debuff Condemnation needs and lowers the enemy's PvE Damage Tolerance, which raises damage for the entire party. Condemnation can reset on crit, so with the right setup it repeats several times in a row.
Skill Priority
Chain of Torment and Condemnation to 16. This is your main damage loop and a party-wide debuff.
Healing Light to 16. Your most reliable short-cooldown heal and the healing skill most worth investing in early.
Judgment Thunder, Earth's Retribution and Divine Aura after that. Take MP-focused Specialties on Earth's Retribution until mana stops being an issue.
Stigmas
Earth's Punishment: makes Condemnation land as a crit, which lets its reset chain repeatedly, your key offensive Stigma
Light of Protection: party-wide damage and damage reduction
Noble Aura: steady extra damage
Resurrection: keep it while your group is still learning mechanics, swap for something offensive once clears are consistent
Passives
Clerics get the most from active skill breakpoints early, so take passives when they are convenient. Once the core skills are developed, prioritize:
Macro and Stats
Macro: Chain of Torment → Debilitating Mark → Condemnation → Judgment Thunder
Manual: all heals, cleanses, Earth's Punishment and party buffs
Stat priority: Accuracy → Combat Speed → Critical Hit → Attack → Double / Damage Boost
When the party is in trouble, stop attacking and heal. Keeping the group alive is still the Cleric's first job in hard content.
Chanter Build

Role: melee support DPS
The Chanter fights in melee with a staff and brings some of the strongest group buffs in the game. It is not a dedicated healer like the Cleric, but a well-played Chanter raises the whole party's damage while dealing solid damage itself.
The PvE build revolves around Dark Crush. Spinning Strike and Impactful Crush both open a short window to use it, and its level 16 Specialty removes its cooldown so you can use every window.
Skill Priority
Dark Crush to 16 first. The cooldown removal is what makes the rotation flow.
Spinning Strike next. It opens Dark Crush and gives a stacking Critical Damage buff.
Impactful Crush as your second Dark Crush opener, with a stun that is guaranteed on NPCs.
Incandescent Blow and Onslaught as fillers. Onslaught restores MP and shortens Spinning Strike's cooldown.
Recuperation for emergency party healing and cleansing.
Stigmas
Undefeated Mantra: your main long-term investment, a party-wide damage and damage reduction buff that gains extra stats at every breakpoint
Power of the Storm: party Combat Speed and cooldown reduction
Marchutan's Wrath: extra attack inside your damage chain
Fracturing Blow: lowers the target's Defense to create a burst window
Passives
Attack Preparation: safe first pick for damage and Accuracy
Earth's Promise: lowers enemy Damage Tolerance, great value in group content
Impact Hit, Raging Spell and Inspiring Spell after that
Macro and Stats
Macro: Spinning Strike, then Dark Crush → Marchutan's Wrath → Impactful Crush → Incandescent Blow
Left mouse button: Onslaught
Manual: Power of the Storm, Undefeated Mantra, Fracturing Blow, Recuperation
Stat priority: Accuracy → Combat Speed → Attack → Critical Hit → Damage Boost / Double
Save Power of the Storm and Fracturing Blow for when the group is ready to burst rather than pressing them on cooldown.
Which Build Should You Play?
Every build above works, so the real question is which playstyle fits you:
Easiest solo progression: Gladiator and Ranger are forgiving and strong from the start.
Highest damage ceiling: Assassin, if you are comfortable staying behind the boss and timing bursts.
Safe ranged damage: Sorcerer and Spiritmaster, with mana or summon management as the trade-off.
Group roles: Templar is the main tank, Cleric is the main healer, and Chanter is the pick if you enjoy supporting while still dealing damage.
Tank and healer players also tend to find groups for Expeditions and Transcendence faster, which speeds up gearing.
Common Build Mistakes
Spreading points evenly. Two core skills at level 16 beat six skills at level 12.
Leveling all four Stigmas together. Shards are limited, so push one Stigma to its key breakpoint first.
Ignoring Accuracy. Missed attacks cancel out every other stat on your gear.
Putting buffs in the macro. Major buffs and burst Stigmas should be manual so they line up with your damage window.
Rerolling stats too early. While you are still chasing item level, upgrades matter more than perfect stat lines.
Frequently Asked Questions
What makes up a build in Aion 2?
A build is your choice of active skills and their Specialties, your passives, your four equipped Stigmas and the way you chain them in a macro. Gear stats support the build, but they are not part of it.
Why do skills stop at level 10?
Skill points can only raise active skills to level 10. To reach the important level 12, 16 and 20 breakpoints, you need extra skill levels from Daevanion boards, Arcana and gear.
How many Stigmas can I equip?
Four, chosen from a pool of thirteen per class. The slots unlock at character levels 22, 27, 32 and 37.
Do I have to use macros?
No, but macros let you chain several skills on one key, which noticeably increases damage in practice. Nearly every competitive PvE build uses them.
Can I save multiple builds?
There is currently no loadout save option. To test a different setup, you reset and reallocate your points manually, so it is worth planning your breakpoints before spending.
Are these builds good for PvP?
They are tuned for PvE. PvP builds usually trade some damage Stigmas for crowd control, mobility and survivability, so expect to swap a few pieces for Abyss content.


 Aion 2